Parts and tools to gather before you shut off the water
Start with the disposal itself. A 1/3 horsepower unit handles a small household, while 1/2 and 3/4 horsepower models grind more and run quieter. Most kits include the mounting assembly: a backup ring, fiber gasket, mounting ring, and snap ring. Check that the box lists a discharge elbow and a cord or hardwire cover.
You also need plumber's putty, a 1 1/2 inch P-trap kit, slip-joint washers, a short length of 1 1/2 inch tailpiece, a flat screwdriver, a hammer, channel-lock pliers, and a bucket. If your sink has two bowls, add a continuous waste tee so both drains join before the trap.
Keep a flashlight and a small mirror handy. The underside of a sink cabinet is dark and cramped, and a mirror saves you from lying with your head in the cabinet to read a label.
Shopping and prep checklist
Run through this list before you pull the old drain apart. It prevents the classic mid-job trip to the hardware store with the sink in pieces.
- Disposal unit with a mounting kit that matches your sink flange thickness.
- 1 1/2 inch P-trap and a trap arm long enough to reach the wall stub-out.
- Continuous waste tee if you have a double-bowl sink.
- Dishwasher drain hose clamp, plus a new hose if the old one is cracked.
- Power cord kit, or a clamp connector and wire nuts if you hardwire.
- Plumber's putty, not silicone, for the flange seal.
- A towel and bucket for the water trapped in the old trap.
Step by step: mounting the flange and the disposal
Set the sink flange
Remove the old basket strainer by loosening the locknut under the sink. Clean the sink opening of old putty. Roll a rope of plumber's putty about as thick as a pencil, press it under the lip of the new flange, and seat the flange in the opening.
From below, slide on the fiber gasket, backup ring, and mounting ring. Seat the snap ring in its groove and tighten the three mounting screws evenly. Wipe the squeezed-out putty from the top.
Hang the disposal
Lift the unit so its three ears line up with the mounting ring, then twist until it locks. A friend helps here because a disposal weighs 8 to 15 pounds and your arms are overhead. Rotate the body so the discharge port faces the trap arm.
The dishwasher knockout everyone forgets
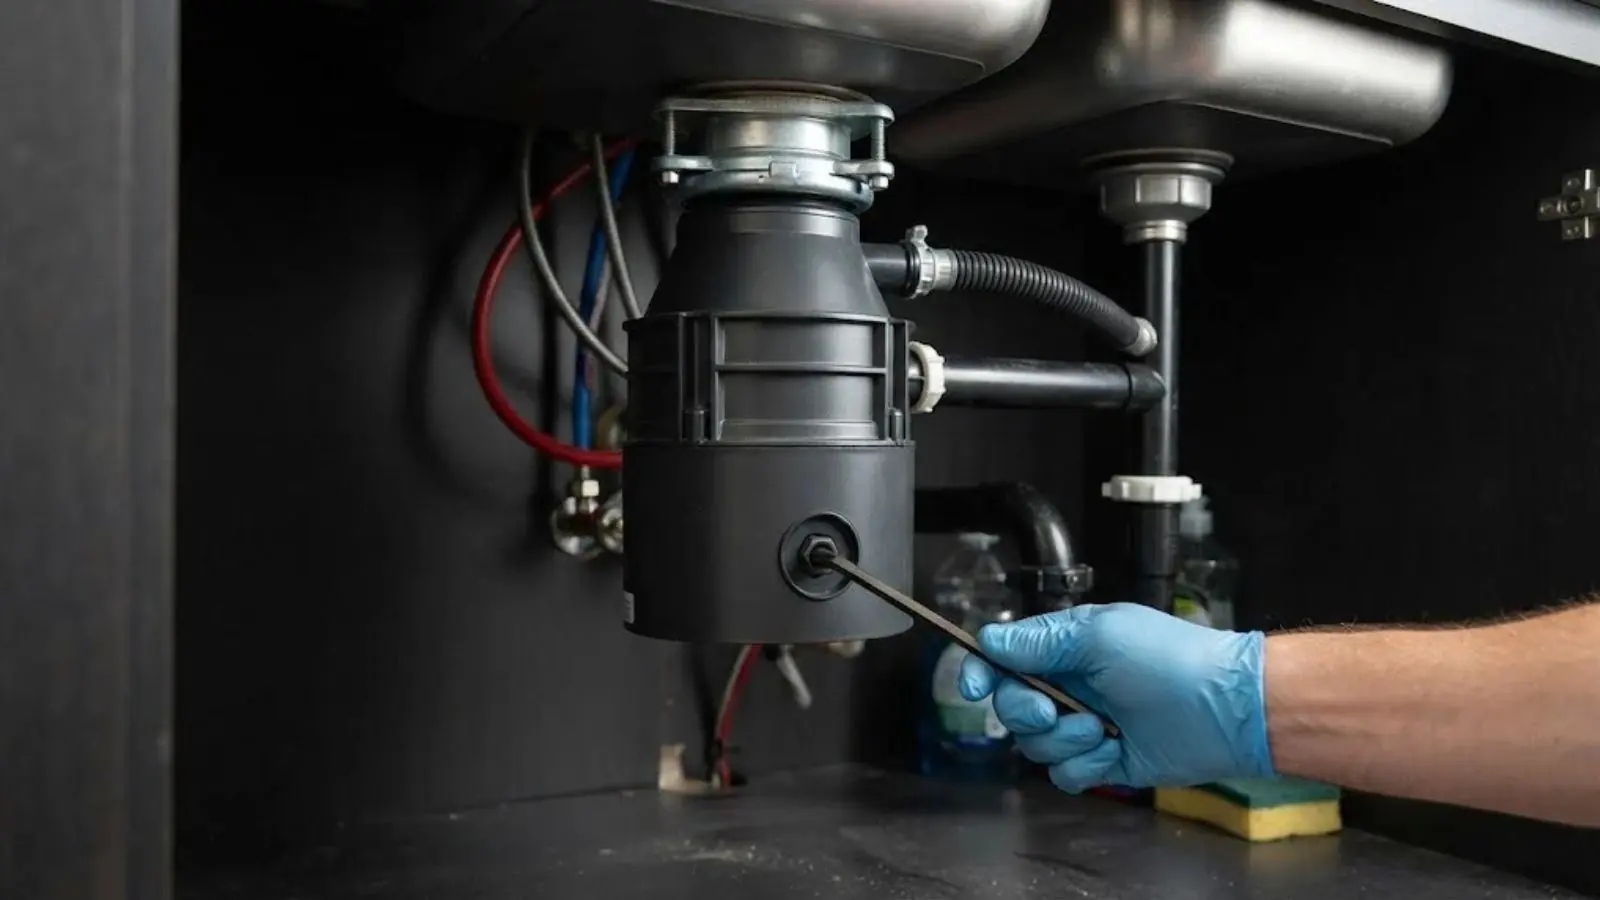
If a dishwasher drains into the disposal, the inlet nipple on the side of the unit has a plastic plug blocking it from the factory. That plug is the knockout. Set a flat screwdriver against it and tap it with a hammer until it drops inside the grinding chamber.
Fish the plug out with pliers before you ever turn the unit on. Left inside, it can jam the shredder or sit in the drain line and cause a slow backup. Then clamp the dishwasher hose to the nipple and follow your dishwasher manual for the high loop or air gap setup.
If there is no dishwasher, leave the knockout in place. Knocking it out by mistake leaves an open hole that will leak under the sink.
Rebuilding the drain: trap and fittings
After the disposal is on, the drain below it gets rebuilt. This table shows what goes where.
| Part | Size | What it does |
|---|---|---|
| Discharge elbow | 1 1/2 inch | Connects the disposal outlet to the trap arm |
| Continuous waste tee | 1 1/2 inch | Joins two sink bowls ahead of the trap |
| P-trap | 1 1/2 inch | Holds a water seal that blocks sewer gas |
| Trap arm | 1 1/2 inch | Runs to the wall drain, sloping down toward it |
| Slip-joint washers | 1 1/2 inch | Seal each hand-tight joint, bevel facing the fitting |
Powering the disposal safely
Most disposals run on a standard 120 volt circuit and plug into a receptacle under the sink, controlled by a wall switch. Some kits have no cord, so you wire the unit through a cable clamp into its hardwire box. Turn the breaker off and confirm the wires are dead with a tester before touching anything.
Match wire colors: black to black, white to white, and the green or bare ground to the green screw. If there is no switched receptacle or switch near the sink, that is new electrical work. Stop there and call a licensed electrician.
Permits are a city question. The City Building and Fire Safety Department at (407) 571-8446 can tell you whether a like-for-like swap needs one.
What Altamonte Springs homeowners should know before this job
The city runs its own sewer, with about 137 single-family subdivisions and 97 multifamily communities on the system. If you rent in one of those communities, a disposal swap usually needs the property manager's okay, so ask before you start. The city lists a stand-alone plumbing permit type for work that needs no plans, so call (407) 571-8446 before a full drain rebuild.
A disposal also sends more solids into the city sewer line. Cold water and a short run after each use clear the line, and grease still belongs in the trash can, not the drain.
DIY or call a plumber: a quick decision guide
Use this to size up your own situation honestly.
| Situation | Good DIY | Call a pro |
|---|---|---|
| Swapping an old disposal for the same size | Yes, if the flange is sound | If the flange is corroded or cracked |
| First-time install, plug-in outlet present | Yes, with patience | If walls or cabinets limit access |
| No outlet or switch near the sink | No | Electrician plus plumber |
| Slow drain after install | Check slope and trap first | If water backs up in the other bowl |
| Leak you cannot trace | No | Yes, any time |
What a disposal install costs
The part is the smaller piece of the bill. A typical disposal runs about $100 to $400 depending on horsepower, sound insulation, and whether it has a cord. Labor for a straight swap is commonly $150 to $400, while a first-time install with new trap work costs more. These are typical ballparks that change with the job.
You get the number before we begin, which lets you weigh it against a weekend, a few new tools, and the risk of a leak inside a cabinet.
- Unit qualityHigher horsepower and sound insulation raise the part cost.
- Existing drain conditionA corroded flange or worn trap adds parts.
- Electrical workA missing outlet or switch is separate wiring work.
- Dishwasher hookupA new hose or air gap adds a small charge.
For the other side of the story, our disposal repair team fixes jammed or leaking units before you spend on a new one.
After install: first run and long-term care
Run cold water, switch the unit on, and drop in a few ice cubes. Listen for a smooth hum, not metal on metal. Check every joint again after 24 hours, because a joint that stays dry for an hour can still weep overnight.
Feed it small scraps, run cold water for 15 seconds after, and keep fibrous stalks, bones, and coffee grounds out. If the sink backs up despite all that, the clog is likely past the trap, and a professional drain cleaning clears the line without breaking your new setup.
If the cabinet floods or the install stalls, we send a technician the same day when the schedule allows, including to Longwood and Winter Springs homes.
If water is spraying, pooling, or you smell gas, turn off the supply, stop work, and call. Gas leaks need 911 first, then your gas utility's number on your bill.
Disposal installation questions
Often yes. The sink needs a standard 3 1/2 inch drain opening, enough cabinet space under it, and a power source. If there is no outlet or switch, plan on electrical work first.
Only if a dishwasher drains into the disposal. Knock the plug out from the inside and remove the piece, or the dishwasher cannot drain. If you have no dishwasher, leave it in.
A gurgle usually means a trap arm that slopes the wrong way or a venting problem. Check the slope first. If that is right, a plumber should look at the vent.
Yes, with habits. Cold water, small scraps, and no grease keep the line clear. Fibrous and starchy food can still stack up in the pipe.
The City Building and Fire Safety Department, at (407) 571-8446. Ask whether your specific swap needs a permit, because the city's pages list permit types but we did not find a published rule for disposals.
Plan on two to three hours for a swap and longer for a first install with trap changes. A plumber working with a clear cabinet and standard parts is often faster.